Tuesday, May 24, 2016

In-place-upgrade and installation of Citrix XenDesktop/XenApp 7.8 VDA on Windows 2012 R2 fails “Ica_TS.msi”

Today I unexpectedly had a challenge upgrading a Citrix XenApp 7.6 VDA to Citrix XenDesktop 7.8 VDA on Windows 2012 R2. During the in-place-upgrade of the 7.8 VDA or a reinstallation of the 7.8 VDA, the installation fails at the section Virtual Delivery Agent:

The XenDesktop Installation log (opened if Show error log is enabled) is showing the following error:

13:20:54.8513 $ERR$ : XenDesktopSetup:Installation of MSI File 'IcaTS_x64.msi' failed with code 'InstallFailure' (1603).
13:20:54.8513 $ERR$ : XenDesktopSetup:InstallComponent: Failed to install component 'ICA for Remote Desktop Services'. Installation of MSI File 'IcaTS_x64.msi' failed with code 'InstallFailure' (1603).
13:20:54.8523 $ERR$ : XenDesktopSetup:Recording installation failure. Installation of MSI File 'IcaTS_x64.msi' failed with code 'InstallFailure' (1603).
 
The following error is in the Application log of the Windows Eventviewer:
 
Product: Citrix HDX TS (retail) -- Error 1911. Could not register type library for file C:\Program Files\Citrix\Euem\Service\SemsComLibrary.tlb. Contact your support personnel.
 
 
To solve this issue, uninstall the following Windows updates prior updating or installing the Citrix XenDesktop 7.8 VDA:
After the VDA upgrade/installation it is save to reinstall the KB updates again!

Monday, May 23, 2016

“Failed to launch the resource ‘XenDesktop 7.6 $S1-1’as it was not found.” After upgrade to StoreFront 3.5

This weekend I was upgrading Citrix StoreFront 2.6 to Citrix StoreFront 3.5. The in-place-upgrade was working out of the box and finishes successfully at once! When testing the upgrade by logging in with ThinClients, we cannot connect to any XenApp 7.6 resource (PubApps and PubDesktops). All the XenApp servers are in a Registerd state to the Desktop Delivery Controller. When investigating the eventviewer of the StoreFront servers I found the following Warning message: “Failed to launch the resource ‘XenDesktop 7.6 $1-1’ as it was not found”
After some investigation I’ve found out that Citrix StoreFront 3.5 cannot handle spaces and dot characters in the Display Name of Controllers. My customer has XenDesktop 7.6 as display name containing spaces and a dot:
Renaming the Delivery Controller Display name to XenDesktop solved the problem:
Attention is needed for users which have added resources in their Citrix Receiver. After renaming the Delivery Group Display name, they should add the resource again to their receiver.


Thursday, April 28, 2016

How to: Citrix Workspace Cloud | Secure Browser

Citrix introduced Citrix Workspace Cloud – Secure Browser, this blog describes how to publish a website with it. Secure Browser enables you to open websites with an experience of Google Chrome, Internet Explorer 11 and Internet Explorer 11 x64 in HTML5 supported browsers like FireFox, Safari, Internet Explorer 11, Google Chorme, Opera, etc.
 
Result:


How – to: Publish a Secure Website

Publish a website using Citrix Secure Brower as follows:
1.Goto
https://workspace.cloud.com and login with your Citrix Workspace Cloud credentials
2.On the Citrix Workspace Cloud mainpage click Manage button for Secure Browser

3.On the Secure Browser manage page, click Manage
4.Click Publish a Web App:
5.Provide App Name, URL and Browser version for the website you want to publish:
6.Then click Publish
7.The website is Published, click Launch to test the published website
8.The HTML5 receiver is starting:
9.Confirm if the correct website is opened and confirm if the website behavior is the same as Google Chrome:
10.Go back to the Secure Browser management page and click Copy to Clipboard
 
11.Copy the URL and provide them to your end users:
 

Whatsmybrowser.org information

Publishing an IE11 experience to www.whatsmybrowser.org is resulting in the following user experience in Mozilla Firefox:


Geographical location of Secure Browser

The location of the Secure Browser session I started is originating from servers is in California in the United States.

Download files using Secure Browser

When testing downloading of files from the internet, I’ve got this error message as expected:
 

End user browser experience

Secure Browser is an nice new feature added to the Citrix Workspace Cloud suite. When testing Secure Browser I was thinking of the experience end users get and expect when using a web browser. I think the following things will raise some questions of end users and you need to communicate when implementing Secure Browser:
  • Website navigation buttons (like back/forward) are working for the local browser and not for the HTML5 published website. You can only use backspace to go back to the previous page.
  • Website cookies are not remembered, so banners will pop-up on session start (keep this in mind when implementing Secure Browser)
     

Friday, April 22, 2016

AutoColorization: Pink taskbar and title bar when using Hybrid profile and Active Setup (Windows 2012 R2 and Windows 8.1)

A customer, which has a red and white color logo, got a pink taskbar and title bars after applying a new background on their Windows 2012 R2 Session Hosts. This pink color is generated by default due to the Auto Color in the users taskbar and title bar color personalization setting. In the registry this is called AutoColorization. AutoColorization pics an average color of you background image. In case of this customer red and white makes pink. The customer doesn’t like a pink taskbar for 500+ users, so they decided that it needs to be blue. When using Local Profiles with RES One Workpace Zero Profile mode, this doesn’t work out of the box. Because we are using Local Profiles combined with RES One Workspace Zero profile mode, every time the user logs in the Active Setup is started for themes. The Active Setup is resetting the registry settings for AutoColorization and the color we’ve picked (DWM). We need this active setup at login!
 
The registry keys for setting the taskbar and title bars to blue:
---------------------------------------------------------
Windows Registry Editor Version 5.00
 
[HKEY_CURRENT_USER\Control Panel\Desktop]
"AutoColorization"=dword:00000000

 
[HKEY_CURRENT_USER\Software\Microsoft\Windows\DWM]
"ColorizationAfterglow"=dword:c484c6ff
"ColorizationAfterglowBalance"=dword:0000000a
"ColorizationBlurBalance"=dword:00000001
"ColorizationColor"=dword:c484c6ff
"ColorizationColorBalance"=dword:00000059
"ColorizationGlassAttribute"=dword:00000000
"Composition"=dword:00000001
"EnableWindowColorization"=dword:00000001

---------------------------------------------------------
 
With RES One Workspace it is impossible to set the color behavior properly by using the “User Registry” settings. When applying the correct keys to RES User Registry Settings only, the color of the taskbar and titlebar is changing every session (white, gray, black, etc.) I’ve figured out that the workspace composer isn’t messing these registry keys, but the enabled Active Setup is.

To set a solid color properly, please configure the registry keys as follows:

1. Open your Active Directory Session Host User Policy and add the registry keys to the Group Policy Preference (this applies the registry keys before the RES Composer and Active Setup)

 2. Apply the registry keys again with RES One Workspace User Registry (this applies the registry keys after the Active Setup)
 
3. Bam, solid blue for every user!

If you want another color like orange. Just configure orange in and Admin session and capture the right DWM values for orange.
 

Friday, March 25, 2016

Avoid 1603 errors when upgrading Citrix StoreFront 2.x to Citrix StoreFront 3.5

In the last months I’ve upgraded some customers from StoreFront 2.x installations toward StoreFront 3.0, 3.0.1. Today I was facing a StoreFront 2.1 to 3.5 upgrade. My experience with upgrading StoreFront is that it will fail most times (1603 error). So I’ve learned some fixes that I want to share with you to make the upgrade of StoreFront easier.

Log files of StoreFront upgrade are located in %windir%\temp\StoreFront

Customer load balanced StoreFront set-up

  • KEMP Network load balancer for http, https round robin load balancing between StoreFront servers
  • StoreFront Server Group
    • pbo-sf01: Windows 2012, StoreFront 2.1
    • pbo-sf02: Windows 2012, StoreFront 2.1

The upgrade plan

The upgrade plan looks straight forward, VMware snapshots are used as fallback scenario:
1. Disable pbo-sf02 from load balancing
2. Shutdown pbo-sf02
3. Take snapshots of both StoreFront servers (online quiesce snapshot of pbo-sf01)
4. Start pbo-sf02 and upgrade pbo-sf02 to StoreFront 3.5


5. Test StoreFront upgrade by connecting (thin)clients directly to upgraded pbo-sf02 StoreFront server
6. Enable pbo-sf02 in load balancing and disable load balancing for pbo-sf01
7. Shutdown pbo-sf01
8. Take snapshots of both StoreFront servers (online quiesce snapshot of pbo-sf02)
9. Start pbo-sf01 and upgrade pbo-sf01 to StoreFront 3.5


10. Test StoreFront upgrade by connecting (thin)clients directly to upgraded pbo-sf01 StoreFront server
11. Test StoreFront synchronization by clicking "Propagate changes"
12. Restore load balancing

Locked StoreFront files are causing StoreFront upgrade to fail

During upgrade to StoreFront 3.5 you must ensure that the existing StoreFront files are not in use or the upgrade will fail:
  • Make sure there are no client connections to the StoreFront server before and during upgrade
  • Disable all monitoring services on the StoreFront server, periodically monitoring checks can lock files during upgrade
    • Microsoft Monitoring Agent (HealthService)
    • Comtrade service
    • Nagios NSClient++
  • Temporary disable all agentless remote monitoring checks to the StoreFront server:
    • SCOM: Put server in maintenance mode
    • Nagios: Disable checks for during upgrade period
  • Temporary disable virus scan on the StoreFront server
    • On access scanner
    • Web reputation
  • Reboot server before upgrade to ensure all active sessions are closed

Virtual path /Citrix/StoreWeb is already in use

During upgrades I also faced the following error:

An error occurred configuring the installation: System.InvalidOperationException: Physical path: C:\inetpub\wwwroot\Citrix\StoreWeb associated with Virtual path: /Citrix/StoreWeb is already in use.

 
When troubleshooting this error I did not have the path C:\inetpub\wwwroot\Citrix\StoreWeb on StoreFront server pbo-sf02, the upgrade process moved it successfully to C:\ProgramData\Citrix. So why I’m facing this error? The answer is quite simple. At the end of the upgrade process, the Citrix StoreFront website folders/applications (i.e. WebReceiver) are copied back to Internet Information Services website. I figured out that the upgrade process is using the StoreFront Server Group base URL for this. The base URL is configured to desktop.pbo.local which is the DNS A-record of the KEMP load balancer. Because the load balancing is disabled to the server pbo-sf02 I‘m upgrading, the upgrade process is contacting the other pbo-sf01 StoreFront server through the load balancer desktop.pbo.local. On the pbo-sf01 the virtual path /Citrix/StoreWeb exist so the error is legitimate. I can also imagine that if you get load balanced (i.e. by round robin) to the wrong server during upgrade, the same error occurs.


To bypass this error you can add a record for the load balanced address to the local hosts file of the StoreFront server to force traffic to the local IPv4 address. This registration should be removed after the upgrade completes. Windows host file can be found: C:\Windows\System32\drivers\etc\hosts, add line (example upgrade pbo-sf02):
 

10.175.201.118    desktop.pbo.local

Thumbs up

If you have had other issues upgrading StoreFront, please share the fixes with me.

Tuesday, March 1, 2016

How to: Citrix Workspace Cloud | Apps and Desktops

This blog is a technical step-by-step guide for configuring and using Citrix Workspace Cloud - Apps and Desktops (CWC-AD). In this blog:
  • What is Citrix Workspace Cloud - Apps and Desktop
  • Installation of Citrix Workspace Cloud Connector
  • Install a VDA and connect it to the Citrix Workspace Cloud Connector
  • Create a Machine Catalog on Citrix Workspace Cloud Apps and Desktops
  • Create a Delivery Group on Citrix Workspace Cloud Apps and Desktops
  • Configure a Citrix Workspace Cloud Workspace with Apps and Desktops
  • Citrix Workspace Cloud - StoreFront
  • Connect your on-premises StoreFront to Citrix Workspace Cloud
  • Citrix Workspace Cloud Apps and Desktops – Monitor (Director)

What is Citrix Workspace Cloud - Apps and Desktop

Citrix has built an online cloud platform called “Citrix Workpace Cloud” (CWC). With CWC it is possible to move your on-premises Citrix core components towards the cloud (workspace.cloud.com). The great advantage of this is that you don’t need to install, configure and maintain these core components, Citrix is doing this for you! I.e. for Apps and Desktops you don’t need the following components on-premises:
  • Citrix License Server
  • Citrix Desktop Delivery Controllers
  • Citrix Datastore
  • Microsoft SQL mirror or AllwaysOn database needs
  • Citrix Datastore
  • Citrix StoreFront
To connect your existing environment to CWC you only need to install the CWC Connector on a server. Citrix recommends to install at least two CWC Connectors for redundancy. The CWC Connectors are acting as a proxy between CWC and your environment. After installation of the CWC Connector you only need to point your Virtual Desktop Agents to the CWC Connector and you’re ready to go. Besides CWC-AD the Citrix Workspace cloud also has the following components: Workspaces, Identity and Access Managent, Resource Locations, Lifecycle management, Secure Documents and Mobility Management. This blog only describes the Apps and Desktop part.

Installation of Citrix Workspace Cloud Connector

The first thing to do is to connect your environment to CWC by installing the CWC Connector on a server.

1. Goto workspace.cloud.com and login with your CWC account:

2. Goto Identity and Access Management
3. Click Domains and click plus sign for adding a new domain
4. Klik Download to download the CWC Connector:
5. Save the cwcconnector.exe on the server and execute it
6. A login popup appears, login with your CWC credentials
7. Within two minutes, the installation box disappears and the following services are installed and started on the CWC Connector server:
8. Your domain will appear on Identity and Access Management at CWC

Install a VDA and connect it to the Citrix Workspace Cloud Connector

When the CWC Connector is in place and connected to CWC, you need to install a VDA and point it to the CWC Connector. In this example I will use a Microsoft Azure Windows 2012 R2 Session Host and install the VDA manually on it. You can also use On-premises MCS and PVS, Azure MCS or Amazon EC2.

1. Mount the XenDesktop ISO (or download the VDAServerSetup_78.exe / VDAWorkstationSetup_7.8.exe from download.citrix.com) and select Virtual Delivery Agent for Windows Server OS

2. Select Enable connections to a server machine and click Next
3. Click Next
4. At the Controller address field, fill in the server names of the CWC Connector (in this example Domain Controller AZ-DC-01.azureworkspace.pqrlab.local)
5. Select your components and click Next
6. Click Next
7. Click Install
8. Once the installation has finished, click Finish to restart the Session Host

Create a Machine Catalog on Citrix Workspace Cloud Apps and Desktops

1. On CWC go to Apps and Desktops

2. Click Manage, a HTML5 based PubApp with a Microsoft MMC of Citrix Studio will open for you.
3. Goto Machine Catalogs and click Create Machine Catalog
4. Click Next
5. Select Server OS and click Next
6. Select Machines that are not powered on (we’re using manually provisioned Citrix VDA on Azure) and click Next
7. Click Add Computer… and search for your ServerVDA machine (AZ-XA-01.azureworkspace.pqrlab.local)
8. Click Next
9. Give your Machine Catalog a name and a description, click Finish
10. Your Machine Catalog on CWC is created

Create a Delivery Group on Citrix Workspace Cloud Apps and Desktops

1. On CWC go to Apps and Desktops
2. Click Manage, a HTML5 based PubApp with a Microsoft MMC of Citrix Studio will open for you.
3. Go to Delivery Groups and click Create Delivery Group
4. Click Next
5. Add machines from Machine Catalog and click Next
6. Select Leave user management to Citrix Workspace Cloud and click Next
7. Click Add to add applications
8. Select the ServerVDA installed applications you want to publish in CWC Workspaces
9. Click Next
10. Give the Delivery group a name and description, click Finish
11. The delivery group is created

Configure a Citrix Workspace Cloud Workspace with Apps and Desktops

1. On CWC go to Workspaces
2. Click plus Workspaces to create a new CWC workspace
3. Give the Workspace a name and click Applications and Desktops
4. At this page the Delivery groups with CWC user management are displayed. Add Apps and Desktops from delivery group Man – Azure – XenApp
5. Than click Create Workspace
6. Click the Workspace Azure XenApp to manage the new workspace
7. If you want to manage services, you can do it over here.
8. Click Subscribers and add the domain users you want to give access to the workspace. Click Publish to publish the Workspace.

Citrix Workspace Cloud - StoreFront

By default you will get an CWC managed StoreFront address. You can access this by https://%customername%.xendesktop.net. Keep in mind that you can only use this page for internal access of the Apps and Desktops. You need a NetScaler Gateway for remote access over the internet.
 

1. Goto https://%customername%.xendesktop.net and login with you credentials
2. You can see the CWC Workspace Published Apps here, click Notepad
3. The PubApp Notepad is started on the Azure ServerVDA
4. Goto Desktops to see you CWC Workspace Published Desktops, click Azure XenApp to start the PubDesktop

Connect your on-premises StoreFront to Citrix Workspace Cloud

It is also possible to connect an on-premises storefront to CWC. 

1. Open StoreFront Console on your StoreFront server, go to Stores and click Create Store

2. Give you StoreFront store a name and click Next
3. Point your Delivery controllers to the CWC Cloud connector
4. Click create
5. Click Finish
6. Your on-premises StoreFront is connected to CWC

Citrix Workspace Cloud Apps and Desktops – Monitor (Director)

The Citrix Director is also implemented on CWC. Director is working the same as an on-premises installation, except you cannot configure any role based access. I.e. you cannot limit helpdesk employees in the console.

1. On CWC go to Apps and Desktops

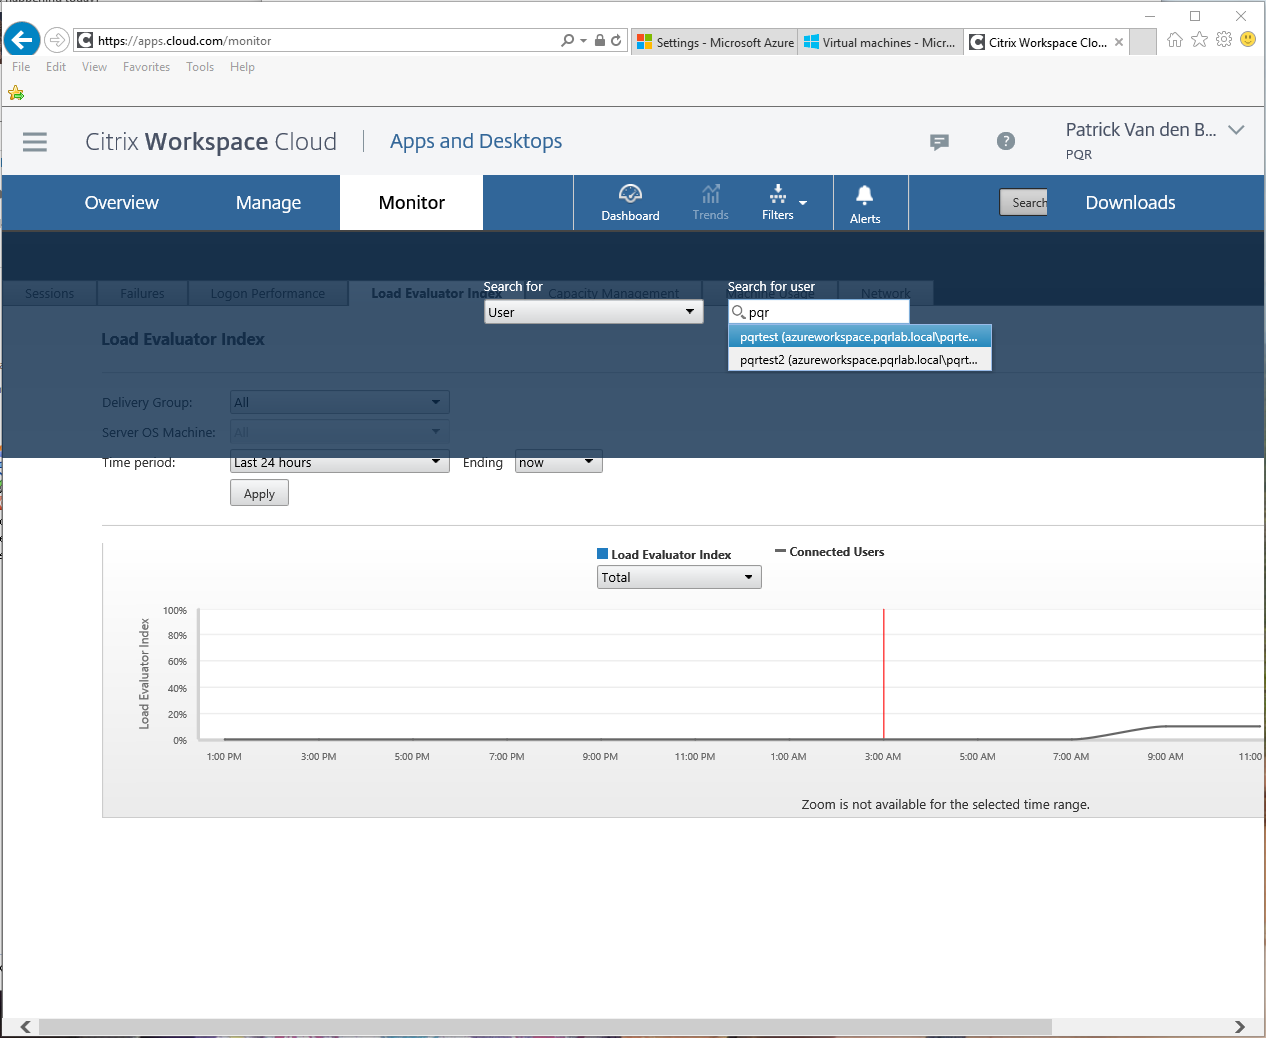
2. Then click Monitor, you will see the familiar Citrix Director dashboard
3. Click Trends to view the historical trends of your Citrix environment
4. Click Search to search and manage a user
5. You can manage Applications and Processes opened by the user on the ServerVDA
6. Or see more details about the user session (like server load evaluator index, ICA RTT, user connection latency):