This blog is an step-by-step guide about how to provision machines in Microsoft Azure using Citrix Machine creation services. This blog describes the creation of a hosting connection to Microsoft Azure, making a capture of the master machine and creating a new Azure Machine Creation Catalog with three new Windows 10 Machines, creating a Delivery Group and give some insight into the MCS Azure proces.
Citrix XenDesktop 7.7 configuration
For this guide I have setup a basic Citrix XenDesktop 7.7 installation in Azure:
Active Directory Domain Controller
- SQL-Server
- Desktop Delivery Controllers
- StoreFront servers
- NetScalers
I tried to use as much as Azure SaaS services for this set-up, but I didn’t used one. Everything is configured as Azure IaaS virtual machines. (For example: SQL Databases in Azure only allows SQL Authentication. XenDesktop only uses AD-integrated authentication)
Master Image configuration
The Master image, used in this guide, is configured as follows:
- Azure Classic Virtual Machine A2
- Azure virtual network name “AMS_Network” and Subnet name “VMSubnet1”
- Windows 10 Enterprise
- Citrix XenDesktop 7.7 VDA
- Office 2013
- Notepad++
Azure and Azure Classic
At the moment two types of virtual machines can deployed in Azure: “Virtual machines” and “Virtual machines (classic)”.
 The classic virtual machines are managed originally by the old Azure management portal (manage.windowsazure.com) and the new virtual machines are managed by the new Azure management portal (portal.azure.com). The new portal can also manage classic virtual machines. It is good to understand that Citrix Machine Creation Services only provisions Microsoft Azure Classic Virtual machines. New style virtual machines is not possible at the moment.
Classic manage.windowsazure.com portal:
The classic virtual machines are managed originally by the old Azure management portal (manage.windowsazure.com) and the new virtual machines are managed by the new Azure management portal (portal.azure.com). The new portal can also manage classic virtual machines. It is good to understand that Citrix Machine Creation Services only provisions Microsoft Azure Classic Virtual machines. New style virtual machines is not possible at the moment.
Classic manage.windowsazure.com portal:
 New portal.azure.com
Create Azure Hosting connection in Citrix Studio
1. Goto https://manage.windowsazure.com/publishsettings/index and download your publishsettings file. (If prompted for login, login with your Azure credentials: 2. Open Citrix Studio:
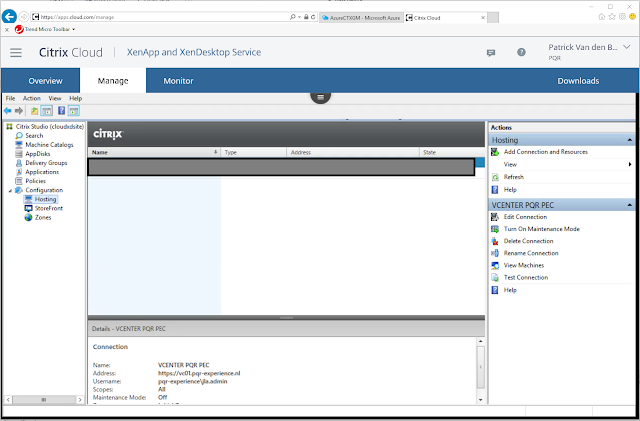
 3. Go to Configuration --> Hosting and click Add Connection and Resources
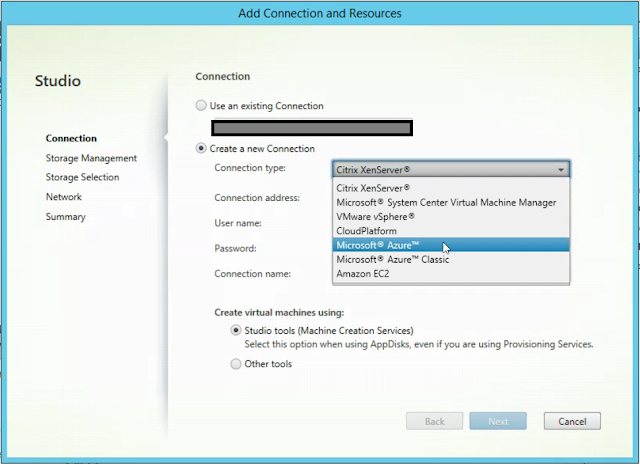
4. Choose connection type: Microsoft Azure Classic and click on Import
3. Go to Configuration --> Hosting and click Add Connection and Resources
4. Choose connection type: Microsoft Azure Classic and click on Import 5. Select the publishsettings file downloaded at step 1
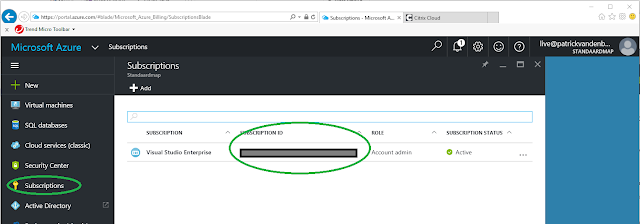
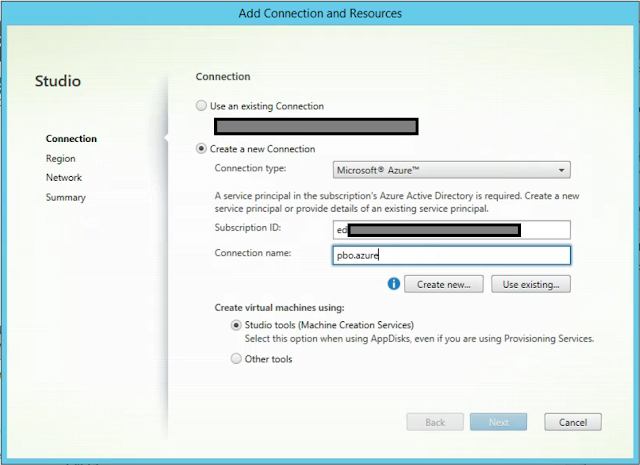
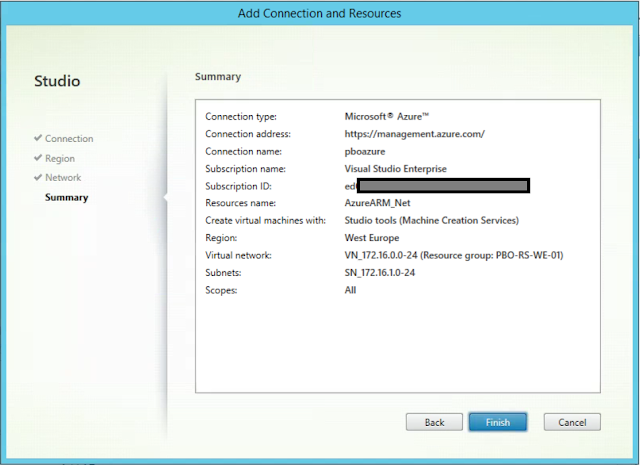
 6. Your Azure Subscription ID will appear, give the connection a name like MSAzureConnection and choose Machine Creation Services. Click Next:
7. Select an Azure region where the virtual machines will be stored and click Next
6. Your Azure Subscription ID will appear, give the connection a name like MSAzureConnection and choose Machine Creation Services. Click Next:
7. Select an Azure region where the virtual machines will be stored and click Next 8. Select the Azure Virtual Network and select the Azure Subnet you want to use for your virtual machines, click Next
9. Click Finish to create the Azure connection
8. Select the Azure Virtual Network and select the Azure Subnet you want to use for your virtual machines, click Next
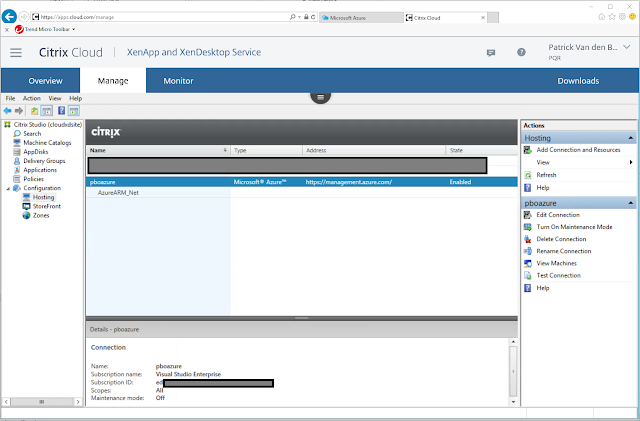
9. Click Finish to create the Azure connection 10. The connection to Azure is created:

Create new Machine Catalog
Like using Citrix Machine Creation Services with on-premises Hypervisor we need to install a master VM, shut it down and create a snaphot. On Microsoft Azure we need to create a “Capture”. This Capture is used to create new Virtual Machines. In this example I’ve used master virtual machine AZ-W10-GM.
1. Go to Virtual Machines on manage.windowsazure.com, select the Master VM and click Capture 2. Give the Capture an Image name and Image Description and click V (Do not select I have run Sysprep on the virtual machine)
3. Wait until the captured image is in the available state
2. Give the Capture an Image name and Image Description and click V (Do not select I have run Sysprep on the virtual machine)
3. Wait until the captured image is in the available state 4. Open Citrix Studio
5. Click Machine Catalogs and click Create Machine Catalog
4. Open Citrix Studio
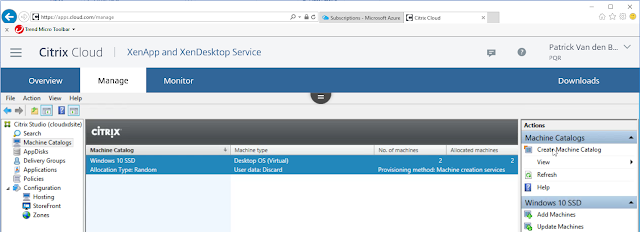
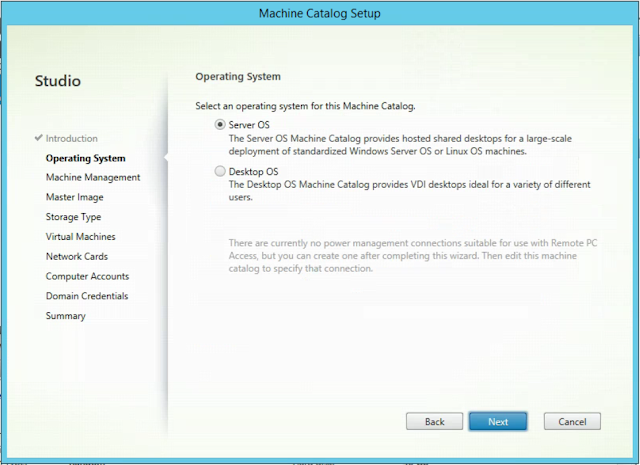
5. Click Machine Catalogs and click Create Machine Catalog 6. Select type of Operating system (in this example Desktop OS) and click Next
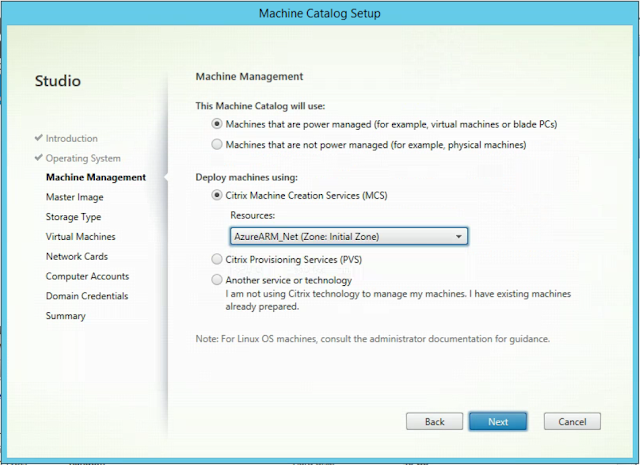
 7. Select Machines that are power managed and select Citrix Machine Creation Services, click Next
 8. Choose your type of Desktop Experience and click Next
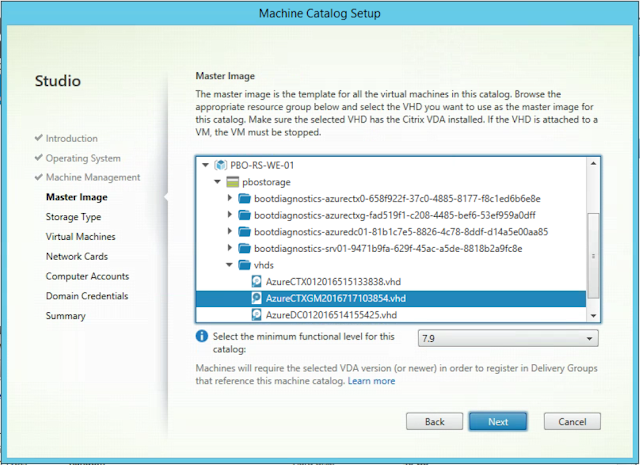
 9. Select the Capture of the Master Image created at step 1, than select the 7.7 VDA version and click Next
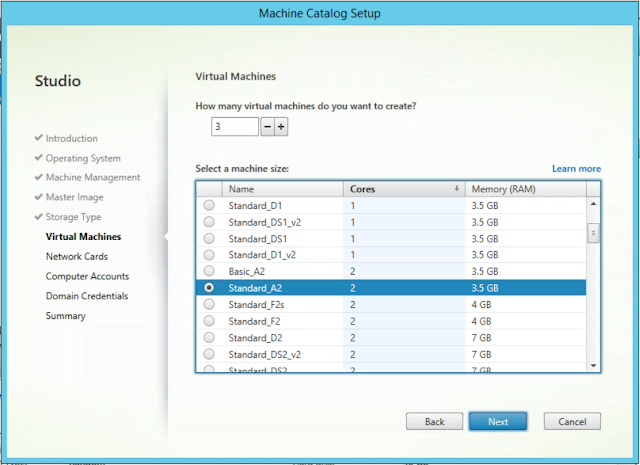
 10. Select the amount of machines (i.e. 3) to create and select the Microsoft Azure Machine size (i.e. Basic_A2). Click Next
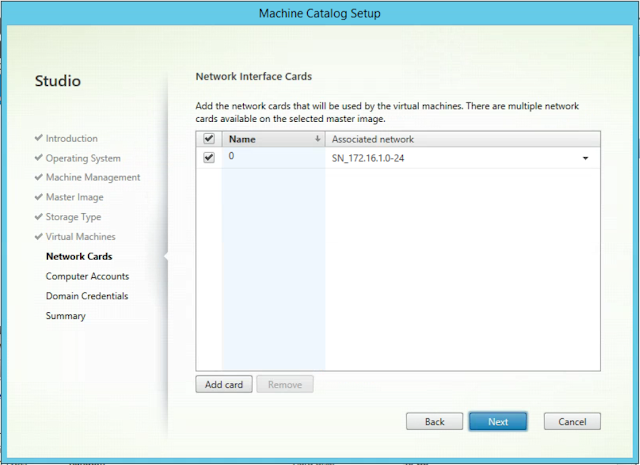
 11. Select the network card and associate it with the Azure Subnet name for your Citrix Machines (i.e. VMSubnet1), click Next
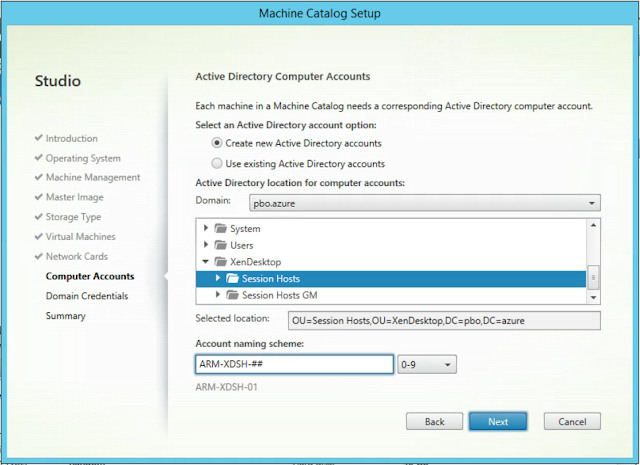
 12. Select Create new Active Directory accounts. Then select the OU for the new machines. And fill in an Account naming scheme for the new machines (use ## for auto increment numbers)
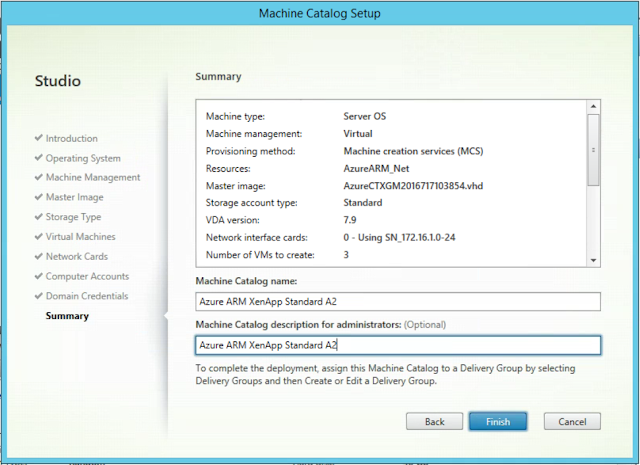
 13. A summary is displayed. Fill in a Machine Catalog name and a Machine Catalog description for administrators and click Finish
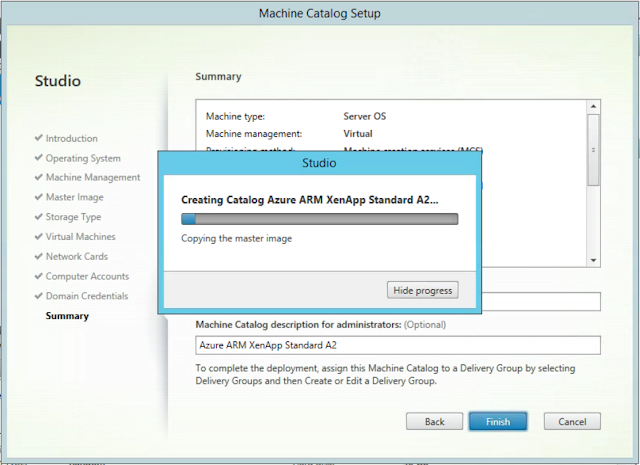
 14. The Machine Catalog is copying the master image (capture) to a capture likeWin10-Azure-MCS-baseDisk-128ti
 15. Like the on-premises MCS a Preparation VM (Preparati-lg5gl) is starting and prepares the MCS basedisk for deployment
 16. After preparation, MCS is creating the MCS virtual machines
17. Each machine gets an Operating System and Identity disk
16. After preparation, MCS is creating the MCS virtual machines
17. Each machine gets an Operating System and Identity disk 18. The Microsoft Azure MCS Machine Catalog is created
 19. Total duration of deployment:
Creating a delivery group
1. Open Citrix Studio
2. Click Delivery Groups and click Create Delivery Group 3. Select the amount of machines you want to add from the Win10 Azure MCS Machine Catalog and click Next
 4. Select Delivery type, in this example Desktops and click Next
 5. Select Users and/or Groups who need access to the Desktop and click Next
 6. Select Manually and click Next
 7. Type in a Delivery Group name and Display name and click Finish
 8. The delivery group is created
XenDesktop power management
The power management function for VDI machines is also available for Delivery Groups with Azure MCS Machines. This feature will give you the advantage to start a number of machines in a specific period, thus allowing you to configure XenDesktop to start less machines outside business peak hours. Tuning this feature for your organization allows you to cut Azure costs, not all VDI machines need to be started 24/7.

Starting and rebooting random (non-persistent) VDI machines on Azure
Starting and restarting random (non-persistent) VDI machines on Azure is taking a lot of more time then rebooting an VDI machine on your on-premises hypervisor. Therefore a good tuned power management will give the best user experience for your Azure workspace.
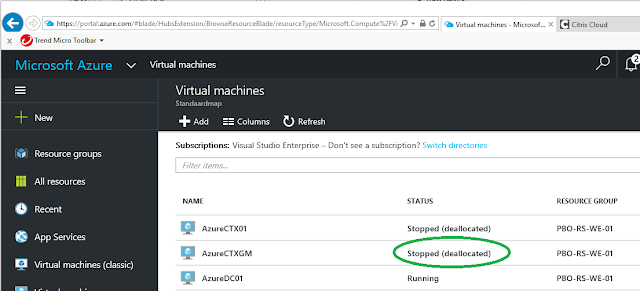
1. When the Azure MCS Machine Catalog was created, I’ve noticed the following Virtual Machines on Azure 2. When machine W10-MCS-01 is started by the Citrix Delivery Controller, Citrix MCS first removes “the old” W10-MCS-01 machine
3. Then provisions a new W10-MCS-01 machine in Azure
2. When machine W10-MCS-01 is started by the Citrix Delivery Controller, Citrix MCS first removes “the old” W10-MCS-01 machine
3. Then provisions a new W10-MCS-01 machine in Azure
 4. After that, you are able to login to your Azure VDI machine: