In the previous blogs I’ve explained you “How to: Install and configure Microsoft SQL Server 2016 Standard multi-subnet Basic Availability Groups for Citrix XenDesktop and XenMobile” and “Microsoft SQL and Microsoft SQL AlwaysOn basics for Citrix Admins”.
In the next series of blogs I will explain to you how to configure “Citrix XenApp/XenDesktop” and “Citrix XenMobile” using SQL MultiSubnetFailover.
This blog starts with “How to configure Citrix Provisioning Services using MS SQL MultiSubnetFailover (Basic) Availability groups”. This is the most easiest one of the three I will describe in my blog.
During the customers project I’ve created the following Citrix Provisioning Services configuration:
- One PVS Farm called: “PBO”
- This PVS Farm contains two PVS sites
- Amersfoort with PVS Servers:
- Nijkerk with PVS Servers
- Both sites having their own PVS-Targets. Since this is a multi-subnet environment, the PVS targets communicate to PVS Servers in their own site.
Logical overview:
Note: Site-to-site network latency is 4ms.
Create initial database
Before we can join the Citrix Provisioning Services database to a (Basic) Availability Group, we need to create a database to one of the SQL Servers. This how-to is describing it using the “Provisioning Services Configuration Wizard”. So this blog can also be used to move from a single SQL database to a (Basic) AlwaysOn Availability Group if you’re already in production.
1. Mount the Citrix Provisioning Services ISO and install “Console” and then “Server”:
2. Assuming you’ve already installed PVS before, I will skip the Installation instructions:
3. Our SQL environment currently doesn’t have a Citrix Provisioning Services Database:
4. When the “PVS Server Installation” finishes, the “Citrix Provisioning Services Configuration Wizard” is started automatically. Click next:
5. Select DHCP properties for your environment. Click next:
6. If you want to use PXE-services, configure it for your PVS Environment. Click next:
7. Select “Create Farm” as we want to create a new Farm here. Click next:
8. Enter the direct server name of your primary/first SQL server. Do not use a listener address here, we will configure AlwaysOn and MultiSubnetFailover later in this procedure. Click next:
9. Enter new names for the SQL Database and PVS environment, click next:
10. Enter details for the new vDisk store, click Next:
11. Enter the configuration to your Citrix License server, click Next:
12. Enter the credentials for your Citrix Provisioning Services service Account, click Next:
13. Leave default, click next
14. Configure the PVS network configuration according to your design. Click next
15. Enable TFTP services. Click next:
16. Configure bootstrap according to your design. Click next
17. Configure SOAP SSL if you have a valid certificate. Otherwise click next
18. If you want to use problem reporting. Please provide your MyCitrix credentials (optional):
19. Press Finish to configure PVS and create a new database, click next:
20. Creating Services and database right now:
21. New SQL database created on “PBO-SQL01” and not on “PBO-SQL02”:
Joining the Citrix Provisioning Services database to a (Basic) AlwaysOn Group
At this point, we want to join the “CTX-PVS” database to a new Microsoft SQL MultiSubnet Basic AlwaysOn Availability Group (BAG). When you have a Citrix Provisioning Services environment running without using BAG, you can also follow these steps to move to BAG.
1. Stop all the “Citrix Provisioning Services” services on all of your Citrix Provisioning Servers. This will stop all communication to the Provisioning Services database:
2. In the SQL Management Studio, right click the new Citrix Provisioning Services database (CTX-PVS) and click Properties:
3. Go to Options. And select Full as the recovery model for the database:
4. Right click the PVS database again and click Tasks --> Back Up..
5. Create a backup of the database:
6. In SQL Management Studio, go to: AlwaysOn High Availability --> Availability Groups. Right click and choose: “New Availability Group Wizard”
7. At the Welcome Wizard, click Next
8. Enter the name of the new Availability group. I.e.: BAG-CTX-PVS and click Next:
9. Select the Citrix Provisioning Services database (CTX-PVS) and click Next:
10. Click Add Replica:
11. Login to your second SQL server, click Connect:
12. Both servers are added. Select “Automatic Failover” and make sure “Synchronous Commit” is configured. Click Listener tab:
13. Seed database using a temporary SMB share, click next:
14. When the availability group validation is successful, click next
15. Verify configuration and click next
16. Creating the availability group:
17. Creation of availability group is successful, click Close
18. Availability group from a SQL point of view:
Reconfigure Citrix Provisioning Services to use the MultiSubnetFailover availability group
The Citrix Provisioning Server services are still stopped on all of your Citrix Provisioning Services Servers at this point. Reconfigure Citrix Provisioning Services to use the Microsoft SQL MultiSubnet (Basic) Availability group as follows:
1. Run this procedure on all of your Provisioning Services Servers one by one
2. On the Citrix Provisioning Services Server start “Provisioning Services Configuration Wizard”
3. I’ve skipped some default steps of the wizard.
4. On the “Farm Configuration Screen” choose: Join existing farm and click next
5. Enter the SQL listener FQDN of the BAG created in SQL and enable “Enable MultiSubnetFailover for SQL Server Always On”. Click Next
6. Select Farm:
7. Choose the correct PVS Site for this PVS Server
8. Choose the correct Store for vDisks and click Next
9. Citrix Provisioning Services services are reconfigured and Provisioning Services started, click Done:
10. Farm properties in Provisioning Services Console:
Last months I was working with @JanPaulPlaisier and @AntonvanPelt on a interesting project: "Create a high available Citrix XenApp and Citrix XenMobile environment between to different data-centers". In this project we’ve also used NetScaler Global Server Load Balancing for redirecting end-users to the correct active data center. The setup is an active/standby set-up where both data-centers are online. The network latency between the two data centers is 4ms.
In the next series of blogs I want to share some knowledge we’ve learned during this project, starting with creating a “multi-subnet SQL AlwaysOn” with SQL Server 2016 Standard.
With the introduction of SQL Server 2016, Microsoft added a new AlwaysOn feature to the Standard product called “Basic Availability Groups” (BAGs). These BAGs are limited compared to AlwaysOn Availablity Groups (AAGs) which is the feature for Enterprise licensed customers:
- BAGs are limited to one database. So every database needs it’s own availability group.
- Backup to the database is limited to the primary database only. So your backup vendor needs to support BAGs.
- No read access to the secondary database.
For a complete overview of Always On Availability Groups: https://docs.microsoft.com/en-us/sql/database-engine/availability-groups/windows/overview-of-always-on-availability-groups-sql-server
If you are using a passive SQL Server instance for failover and the SQL Servers are covered with active SA, then no additional SQL licenses are needed for the failover SQL Server. SQL Server 2016 Licensing Guide: http://download.microsoft.com/download/9/C/6/9C6EB70A-8D52-48F4-9F04-08970411B7A3/SQL_Server_2016_Licensing_Guide_EN_US.pdf . So we can use Basic Availability Groups with a SQL Standard with no additional licenses for the passive failover node.
Citrix is supporting SQL AlwaysOn Availability Groups and Citrix changed the most preferred database availability method to “AlwaysOn” since XenDeskop 7.7.
In this blog I will create a multi-subnet AlwaysOn SQL setup with the following components:
- PBO-SQL01 is the primary SQL-node in datacenter Amersfoort; (SQL Standard 2016)
- PBO-SQL02 is the secondary SQL-node in datacenter Nijkerk; (SQL Standard 2016)
- PBO-FS01 (Nano server) is the file share witness in the datacenter Utrecht;
Logical overview:
This blog contains the following sections:
- Create an OU and service account for SQL
- Assign user rights to SQL Service account for better SQL performance
- Optimal disk configuration for storing User, Log, Temp and Sys Database files
- Install Failover clustering feature
- Configure Windows Failover Clustering
- Configure a file share witness
- Configure Active Directory and DNS permissions for the Failover Cluster
- Installing SQL Server 2016 Standard
- Configure SQL Service for AlwaysOn Availability
- Install SQL Management tools
Create an OU and service account for SQL
It is a best practice to run the SQL Service with a Service Account. When the SQL Service is configured with a service account, we can apply some additional “user rights” to the service account. These “user rights” will have a positive impact on the performance of your SQL Server.
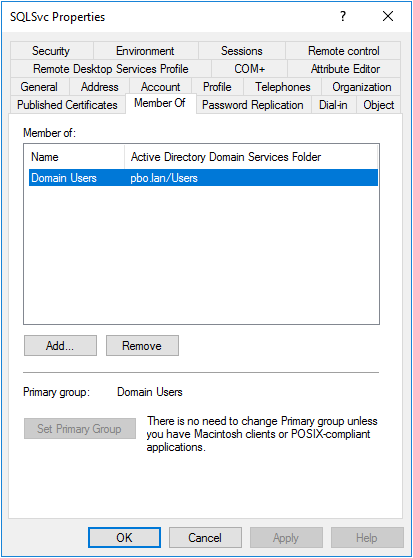
In my lab Active Directory I’ve created the Domain User SQLSvc@pbo.lan. This is the guy we will using for the SQL configuration:
 For the SQL-Servers I’ve created a new OU. Windows Failover Cluster Service will create cluster computer objects in this OU:
Assign user rights to SQL Service account for better SQL performance
For better SQL performance we want to add the following user rights to the SQL account:
- Lock pages in memory (No swapping of memory used by SQL Service)
- Perform volume maintenance tasks (No NTFS right evaluation)
Lock pages in memory
This security setting determines which accounts can use a process to keep data in physical memory, which prevents the system from paging the data to virtual memory on disk. Exercising this privilege could significantly affect system performance by decreasing the amount of available random access memory (RAM). Source: GPMC.MSC
Perform volume maintenance tasks
This security setting determines which users and groups can run maintenance tasks on a volume, such as remote defragmentation.
Use caution when assigning this user right. Users with this user right can explore disks and extend files in to memory that contains other data. When the extended files are opened, the user might be able to read and modify the acquired data. Source: GPMC.MSC
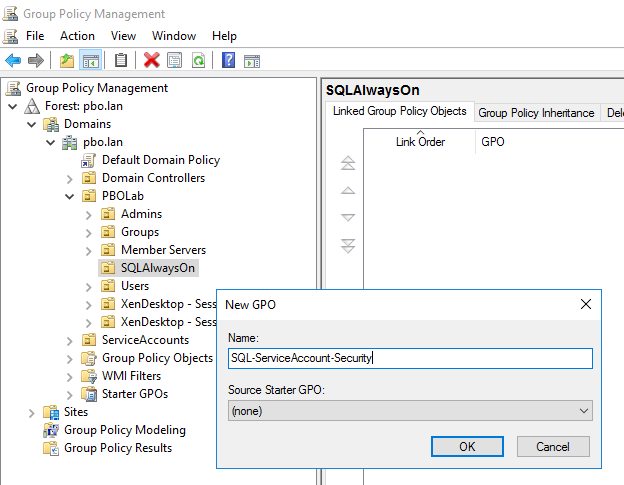
1. Create a new GPO on the SQLAlwaysOn container
 2. Edit the new GPO and go to: Computer Configuration --> Policies --> Windows Settings --> Local Policies --> User Right Assignment. Double click Lock pages in memory:
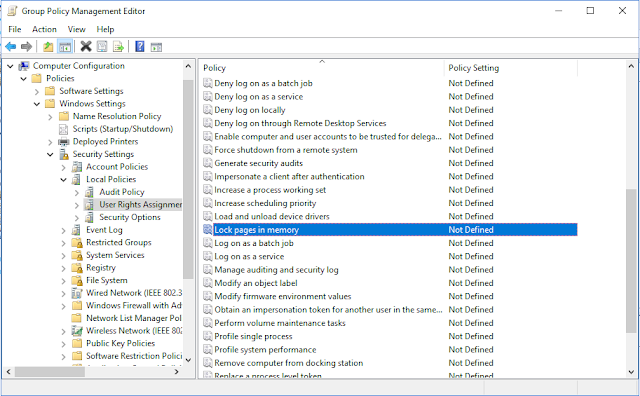
3. Add your SQL Service account:
4. Double click Perform volume maintenance tasks:
5. Add Administrators and your SQL Service account:
6. In my lab setup I’ve added the SQL Service account to the local administrators group. Go to Computer Configuration --> Preferences --> Local Users and Groups. Right click and choose New --> Local Group:
7. Add your SQL service account to the local Administrators group as follows:
Optimal disk configuration for storing User, Log, Temp and Sys Database files
Configure your SQL-Servers with the following disk configuration:
Drive LAB - Size Usage
C:\ 64 GB Windows Server 2016 Operating System
D:\ 10 GB SQL User database files
E:\ 10 GB SQL Log database files
F:\ 5 GB SQL Temp database files
G:\ 5 GB SQL System database files
I always advise customers to use a separate disk for each partition. Extending partitions in the future is simple when using separate disks:
Install Failover clustering feature
Install the Failover clustering feature on both of your SQL-Servers. In my example PBO-SQL01 and PBO-SQL02.
1. Open Server Manager and click Add roles and features:
2. Add feature Failover Clustering and click Next:
3. The Failover Clustering feature installation progress:
4. Click finish when done:
5. Install all Windows updates to both SQL-servers. Ensure installation of both servers are identical:
Configure Windows Failover Clustering
1. Go to one of your SQL servers and open Failover Cluster Manager
2. Click “Validate Configuration..”
3. Welcome wizard, click Next:
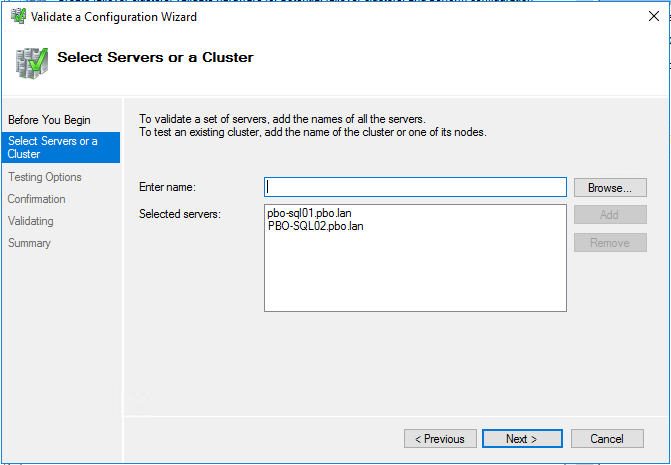
4. Select both SQL-servers for validating, click Next:
5. Select “Run all tests (recommended)” and click Next:
6. On the confirmation dialog, click Next:
7. Both SQL-servers are validating:
8. Select “Create the cluster now using the validated nodes…” and click Finish:
The cluster creation starts.
9. Welcome wizard, click Next:
10. Enter a name for your cluster. And configure IP-addresses in both subnets for the cluster. Click Next:
11. Deselect “Add all eligible storage to the cluster.” and click Next:
12. Forming cluster:
13. Cluster creation completed successfully, click Finish:
In a multi-subnet failover cluster, only one IP-address is up on the primary site:
Configure a file share witness
The cluster doesn’t have a file share witness after creation by default. The file share witness is needed to create an odd value of cluster votes. In a failover situation, the SQL-server with majority of the total votes will become primary SQL-Server. For example if the connection to data center Amersfoort is down, the PBO-SQL01 has one vote and the PBO-SQL02 has two votes. The PBO-SQL02 will become primary and the PBO-SQL01 secondary:
Create a file share with the following permissions:
1. Create a folder on your witness server:
2. Assign the SQL-Service account and the Cluster computer account Full Control on the folder:
3. Create a share and assign full control share permissions to the SQL-Service and Cluster computer account:
Add file share witness to the Failover Cluster as follows:
1. Go to one of your SQL servers and open Failover Cluster Manager
2. Right click your cluster. Click More Actions --> Configure Cluster Quorum Settings…
3. Welcome wizard, click Next:
4. Select “Select the quorum witness” and click Next
5. Select Configure a file share witness and click Next
6. Configure the File Share Path with the FQDN UNC Path to your file share quorum share, click Next:
7. Confirmation dialog, click Next:
8. Click Finish
The file share witness is added to the cluster:
Configure Active Directory and DNS permissions for the Failover Cluster
The Failover cluster need additional permissions to Active Directory and DNS to add new cluster resources (BAGs) and manage IP-addresses of the A-records.
1. Open dsa.msc and navigate to the OU we’ve created for SQL AlwaysOn:
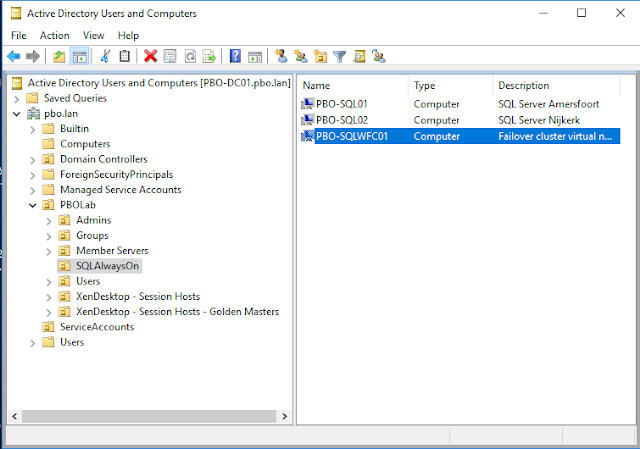 2. Click View --> Advanced Features:
3. Right click on the OU and click Properties:
4. Click Add:
5. Click Object Types:
6. Select Computers and click OK
2. Click View --> Advanced Features:
3. Right click on the OU and click Properties:
4. Click Add:
5. Click Object Types:
6. Select Computers and click OK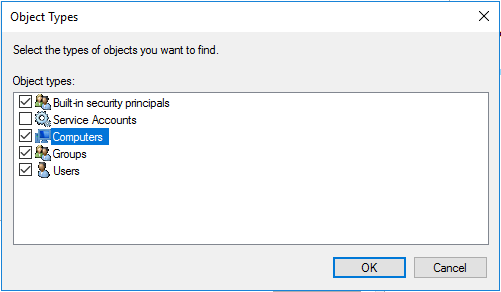 7. Add Failover Cluster computer object and click OK:
8. Click Advanced
9. Select Failover cluster computer object and click Edit
7. Add Failover Cluster computer object and click OK:
8. Click Advanced
9. Select Failover cluster computer object and click Edit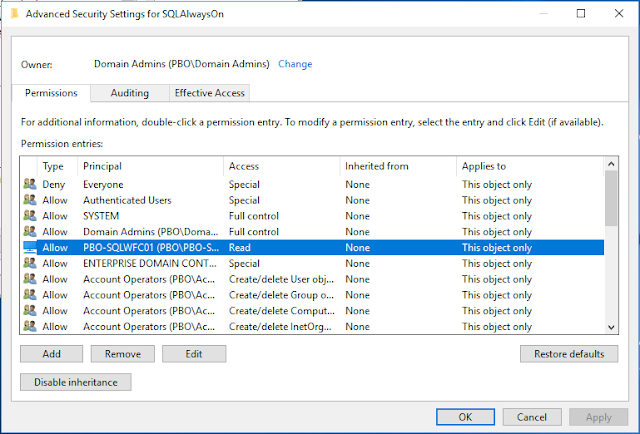
10. Add “Create computer objects” and click OK
11. OK everything to complete Active Directory permissions for cluster computer object
Now we need to grant the failover cluster computer object the permission to add DNS-records to the primary zone of your domain.
12. Open DNS Management (dnsmgmt.msc)
13. Right click the primary zone of your domain. Then click Properties:
14. Go to the Security tab and click Add
15. Select object type Computers, then click OK
16. Add Failover cluster computer object, click OK:
17. Assign the Create all child objects permissions and click OK
Installing SQL Server 2016 Standard
On both SQL Servers, install SQL Server 2016 as follows:
1. Mount the SQL 2016 Standard DVD to the DVD-drive
2. The SQL Server Installation Center will start. Choose Install --> New SQL stand-alone installation or add features to an existing installation
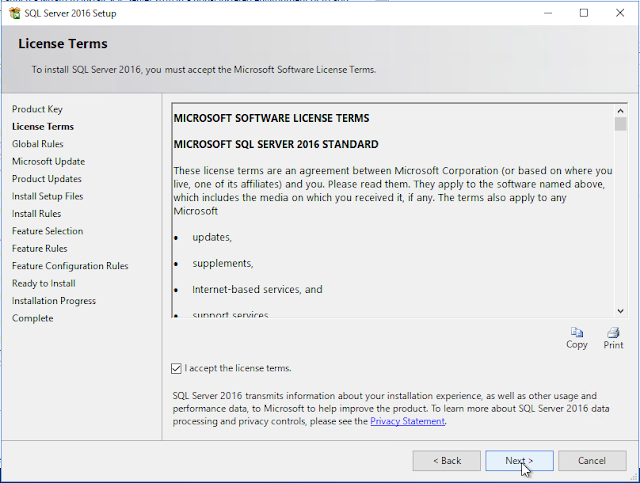
3. The SQL Server setup is started. Click Next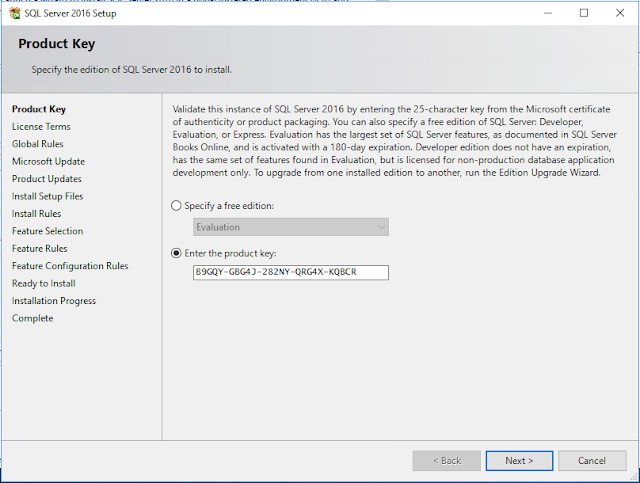 4. Check “I accept the license terms.” and click Next
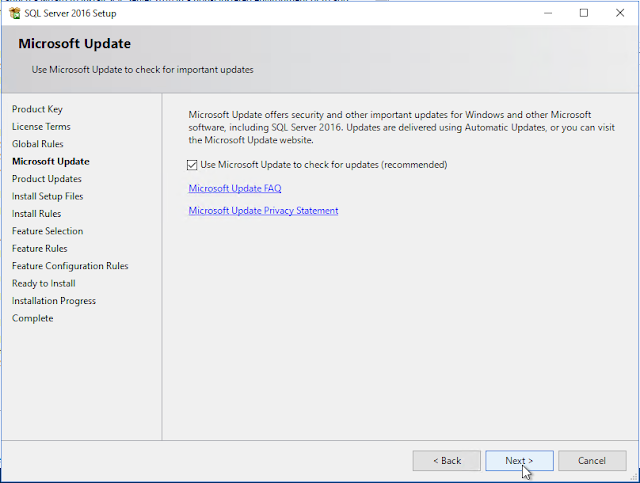
 5. Check “Use Microsoft Update to check for updates” and click Next:
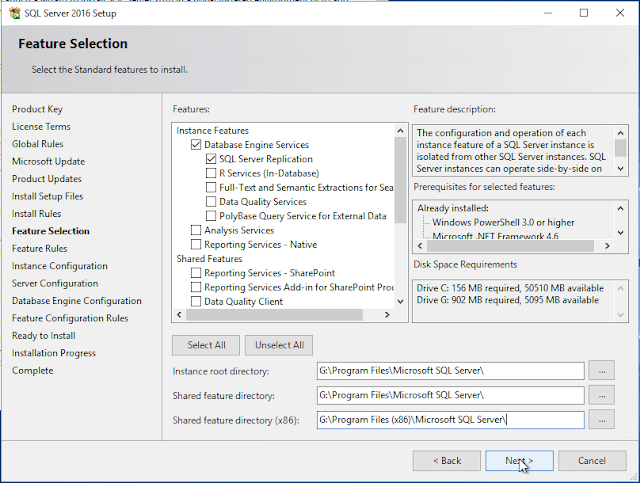
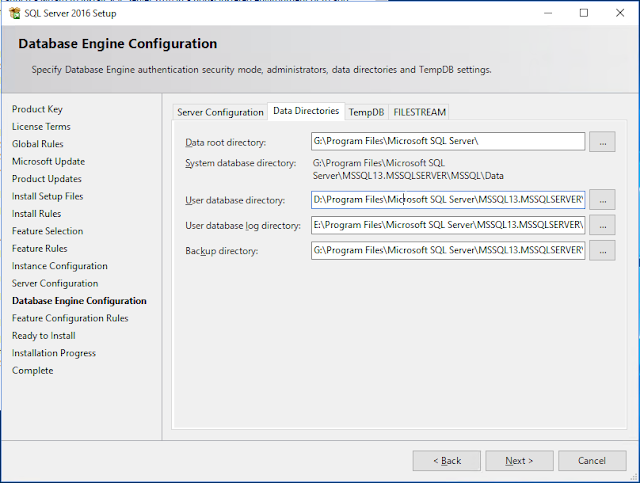
 6. Select features Database Engine Services and SQL Server Replication and change paths to G:\. Click Next
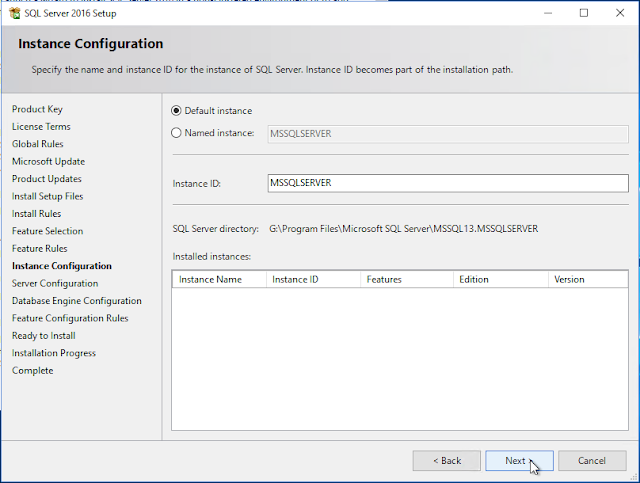
 7. Default, click Next
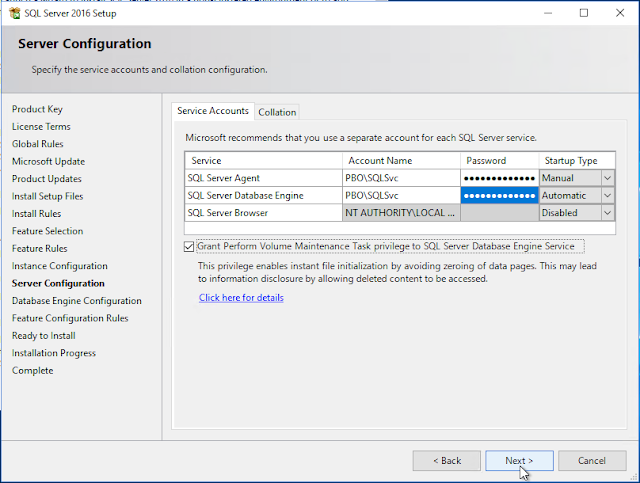
 8. Configure your SQL Service account with password. And click Collation tab:
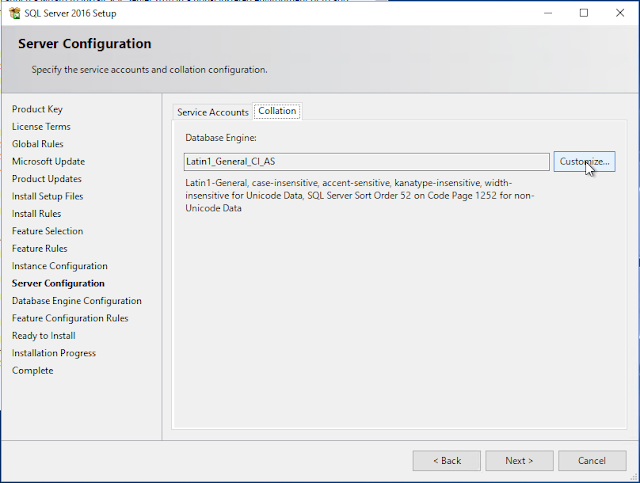
 9. Click Customize:
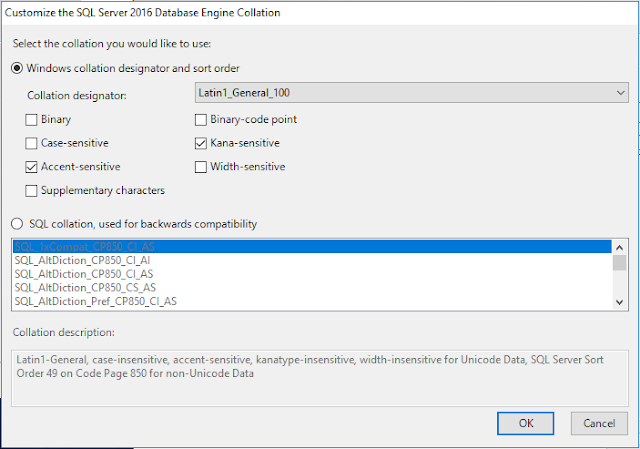
 10. Select “Collation designator: Latin1_General_100” and Accent-sensitive and Kana-sensitive. This is the collation used by the Citrix products, click OK:
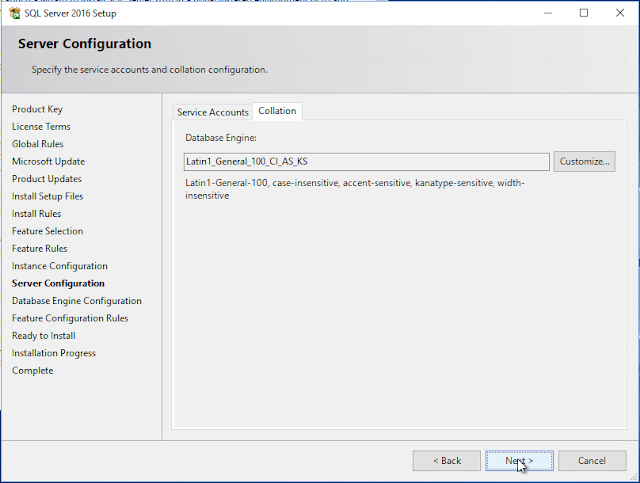
 11. Collation has changed, click Next
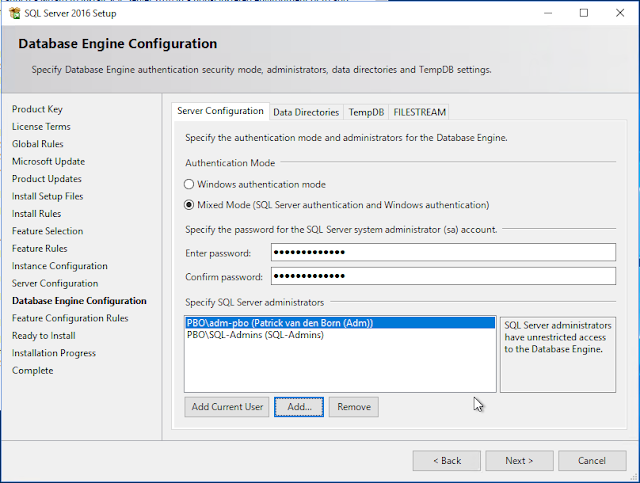
 12. If you need SQL-authentication (RES Needs it) select Mixed Mode. Add your account or an Active Directory group to the SQL Server administrators. Click Data Directories tab:
 13. Configure data directories as follows, click TempDB tab:
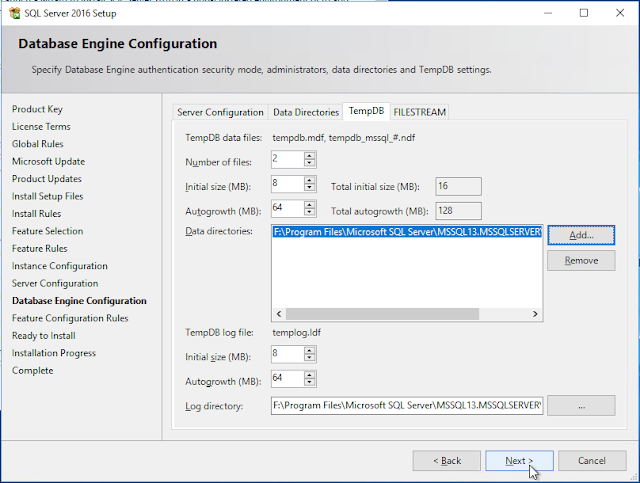
 14. Edit TempDB path to F-drive, click Next
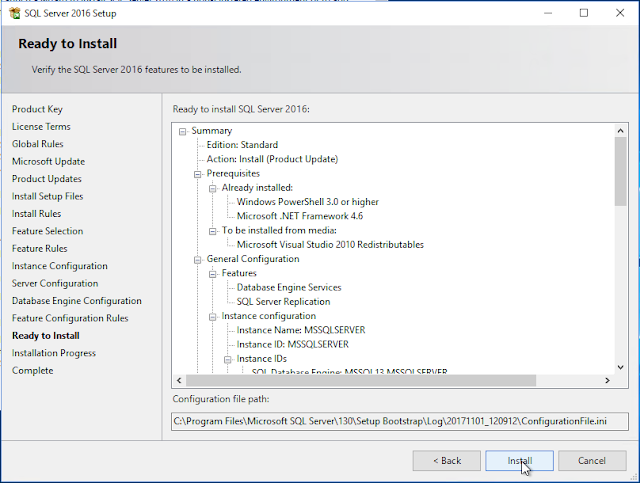
 15. Click Install to start installation:
 16. SQL Server is installing:
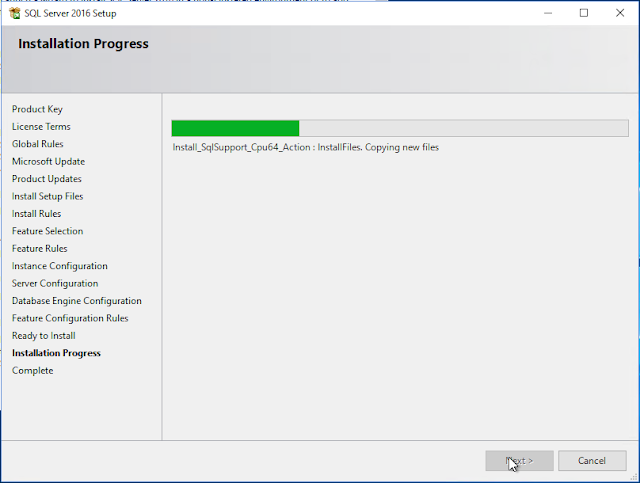 17. Installation finished successfully. Click Close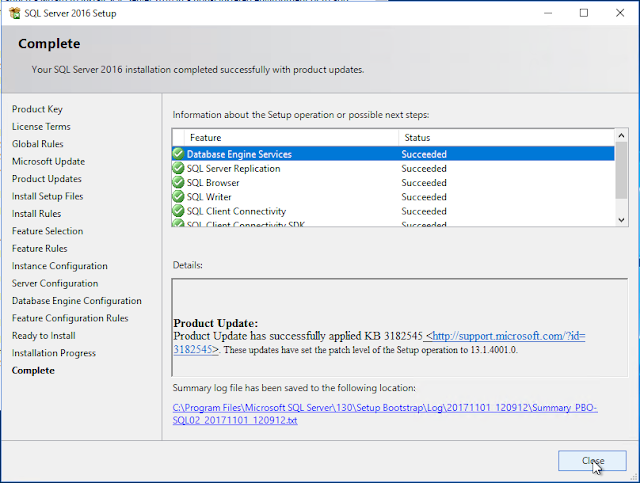
Configure SQL Service for AlwaysOn Availability
Enable the AlwaysOn Availabilty to the SQL service on both SQL-Servers as follows:
1. Open SQL Server 2016 Configuration Manager
2. Go to SQL Server Services --> SQL Server (MSSQLSERVER) --> Properties:
3. Go to tab AlwaysOn High Availability and select Enable AlwaysOne Availability Groups. Click OK
4. Restart the SQL Server (MSSQLSERVER) Service Install SQL Management tools
SQL Management tools aren’t installed by default. Download and install the most recent SQL Management Studio from: https://docs.microsoft.com/en-us/sql/ssms/download-sql-server-management-studio-ssms . Installation is straight forward (next, next, finish)